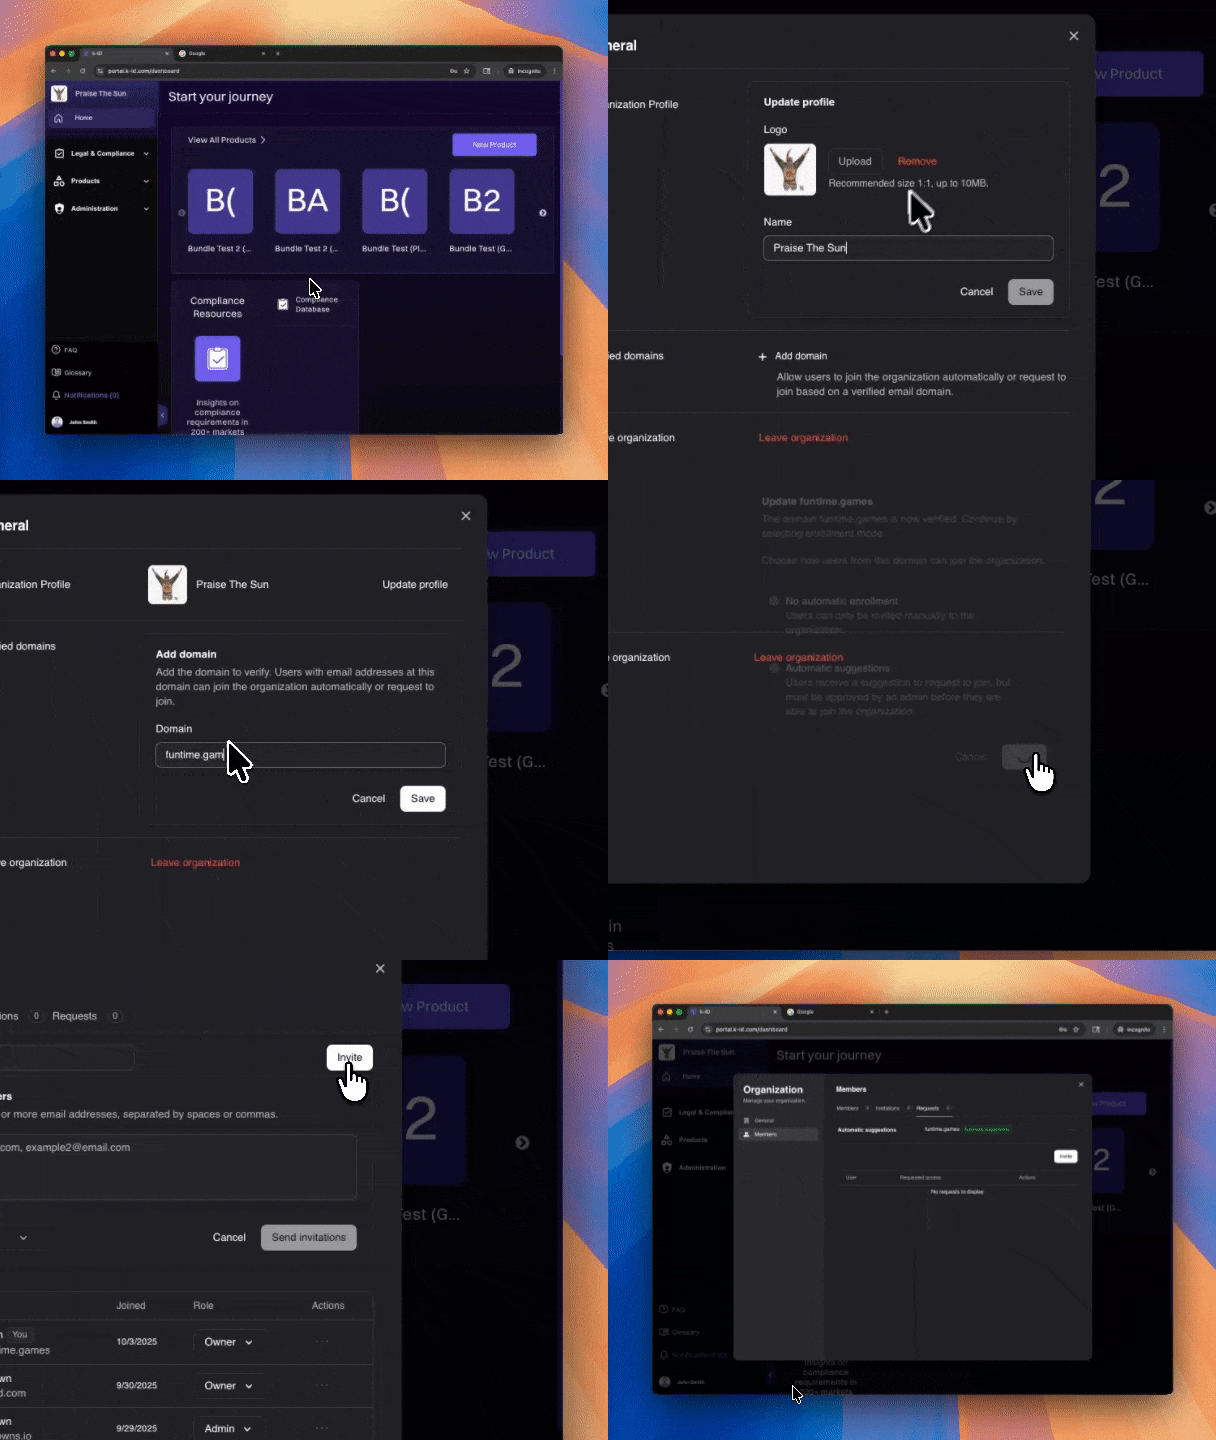
Managing your Organization
Introduction
This guide covers how to manage your k-ID organization's settings, members, and configurations. These operations are only available to users with the Admin or Owner role. If you have a Member or other role, you will not have access to these organization management features. Contact your organization's Owner or Admin if you need changes made to the organization.
Accessing Organization Settings
-
Open Organization Menu
- Locate the organization selector in the top left corner of the screen
- Click on your organization name to open the dropdown menu
-
Navigate to Organization Settings
- In the menu that appears, click Manage
- This opens the Organization settings dialog

Managing Organization Profile
Update Organization Details
- In the Organization dialog, ensure General is selected in the left sidebar
- Under Organization Profile, you'll see:
- Current organization logo
- Organization name
- Click Update profile to change your organization's logo or name
- Make your desired changes and save
Configure Verified Domains
- Under Verified domains, click + Add domain to add email domains
- You will be able to choose from the following two options:
- No automatic enrollment - Users can only be invited manually to the organization.
- Automatic suggestions - Users receive a suggestion to request to join, but must be approved by an admin before they are able to join the organization.
- This allows users with verified email domains to automatically join or request to join your organization
- Verified domains help streamline member onboarding
Leave Organization
- If you need to leave the organization, use the Leave organization option at the bottom of the General section
- Click the red Leave organization button to confirm
Warning: Leaving an organization will remove your access to all organization resources.
Managing Organization Members
View Current Members
- Click Members in the left sidebar of the Organization dialog
- You'll see three tabs:
- Members - Shows current members and their count
- Invitations - Shows pending invitations
- Requests - Shows pending join requests
- Use the search bar to find specific members
Invite New Members
- Click the Invite button in the top right corner
- In the Invite new members section:
- Enter one or more email addresses, separated by spaces or commas
- Example:
example@email.com, example2@email.com
- Select a role from the Role dropdown:
- Owner
- Admin
- Member
- Knowledge
- Customer Support
- Product Evaluation
- Click Send invitations to send the invite
Note: Invited members will appear as "(Pending)" in the members list until they accept the invitation.
Manage Invitation Status
- To delete a pending invitation, use the delete icon (🗑️) in the Actions column
- To resend an invite, click Resend invite in the Actions column
Update Member Roles
- In the Members list, locate the member whose role you want to change
- Click the dropdown next to their current role
- Select the new role from the dropdown:
- Owner - Full access to all organization settings and resources
- Admin - Manage members, settings, and products
- Member - Standard access to organization products
- Knowledge - Access to knowledge base and documentation
- Customer Support - Handle support requests and DSARs
- Product Evaluation - Limited access for testing purposes
- The role change takes effect immediately
Remove Members
- Locate the member you want to remove
- Click the menu icon (⋮) in the Actions column
- Select Remove member
- Confirm the removal
Important:
- You cannot remove yourself while you're an Owner
- Each organization must have at least one Owner
Best Practices
- Assign the minimum necessary role for each member
- Regularly review your member list and remove inactive users
- Use verified domains to automate member approval for trusted email domains
- Keep at least two Owners to prevent access issues