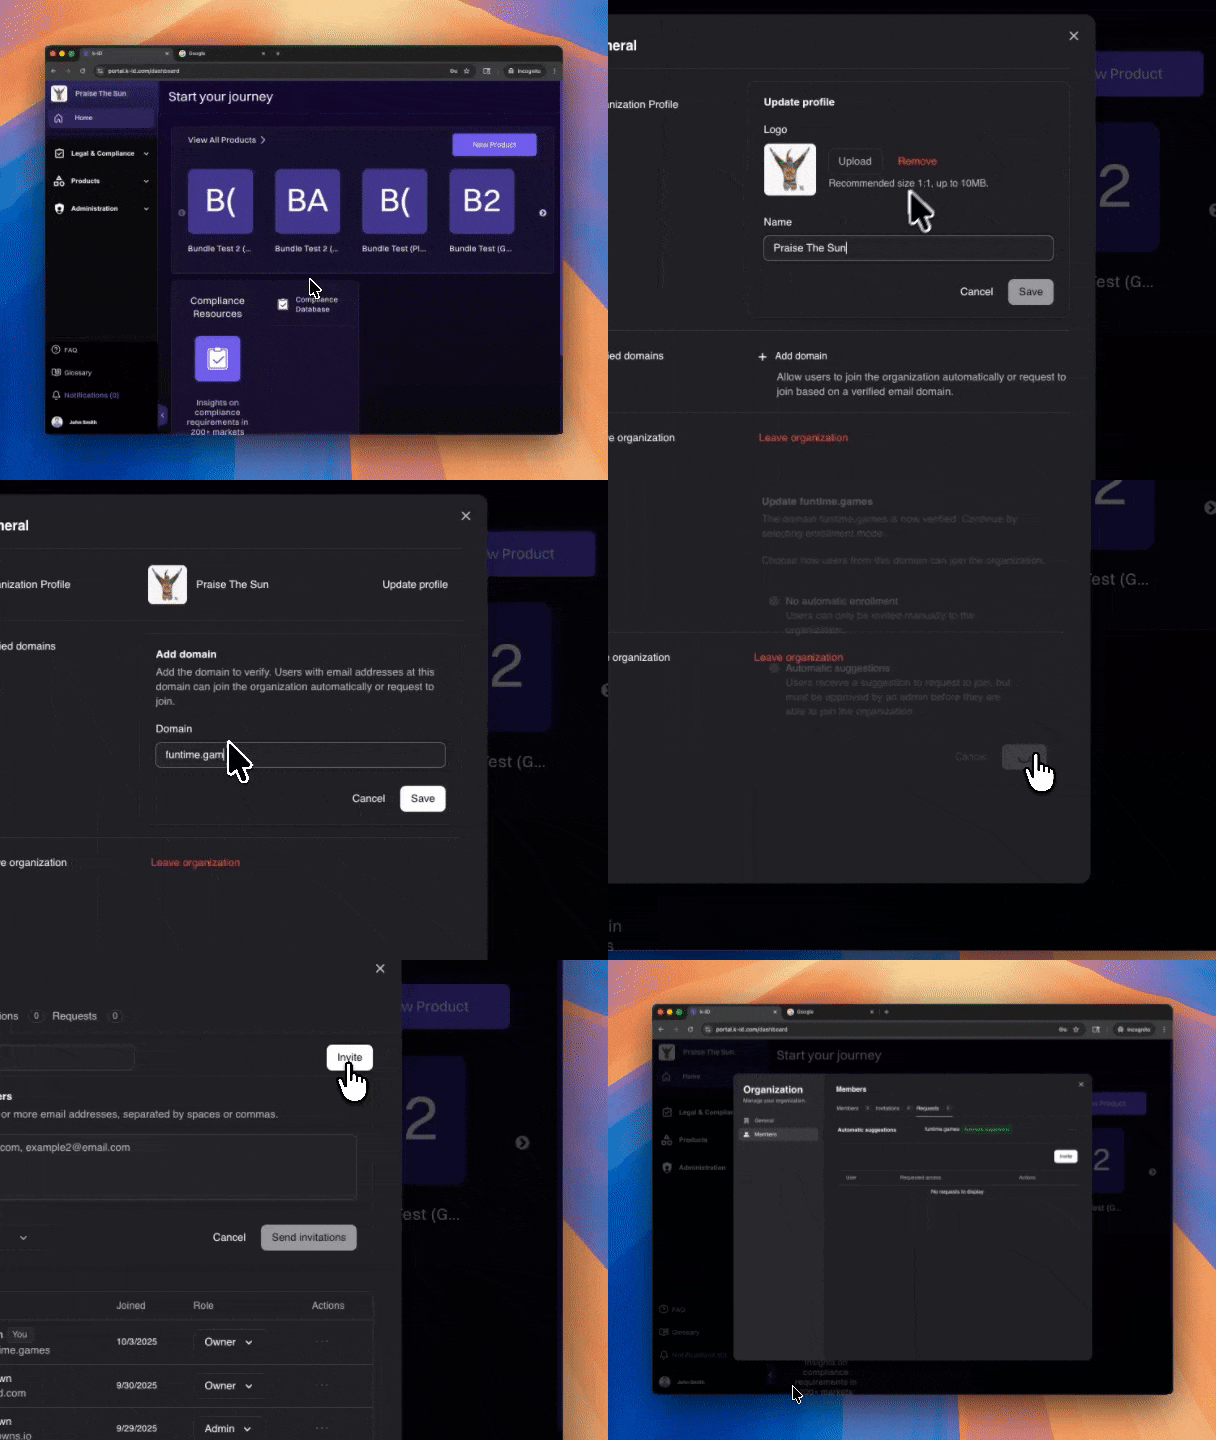
Managing your organization
Introduction
This guide covers how to manage your k-ID organization's settings, members, and configurations. These operations are only available to users with the Admin or Owner role. If you have a Member or other role, you won't have access to these organization management features. Contact your organization's Owner or Admin if you need changes made to the organization.
Accessing organization settings
-
Open Organization Menu
- Locate the organization selector in the top left corner of the screen
- Click your organization name to open the dropdown menu
-
Navigate to Organization Settings
- In the menu that's displayed, click Manage
- This opens the Organization settings dialog

Managing organization profile
Update organization details
- In the Organization dialog, ensure General is selected in the left sidebar
- Under Organization Profile, you'll see:
- Current organization logo
- Organization name
- Click Update profile to change your organization's logo or name
- Make your needed changes and save
Configure verified domains
- Under Verified domains, click + Add domain to add email domains
- You can choose from the following two options:
- No automatic enrollment - Users can only be invited manually to the organization.
- Automatic suggestions - Users receive a suggestion to request to join, but must be approved by an administrator before they're able to join the organization.
- This allows users with verified email domains to automatically join or request to join your organization
- Verified domains help streamline the process for new members
Leave organization
- If you need to leave the organization, use the Leave organization option at the bottom of the General section
- Click the Leave organization button to confirm
Leaving an organization removes your access to all organization resources.
Managing organization members
View current members
- Click Members in the left sidebar of the Organization dialog
- You'll see three tabs:
- Members - Shows current members and their count
- Invitations - Shows pending invitations
- Requests - Shows pending join requests
- Use the search bar to find specific members
Invite new members
- Click the Invite button in the top right corner
- In the Invite new members section:
- Enter one or more email addresses, separated by spaces or commas
- Example:
example@email.com, example2@email.com
- Select a role from the Role dropdown:
- Owner
- Admin
- Member
- Developer
- Knowledge
- Customer Support
- Product Evaluation
- Click Send invitations to send the invite
Invited members appear as (Pending) in the members list until they accept the invitation.
Manage invitation status
- To delete a pending invitation, use the delete icon (🗑️) in the Actions column
- To resend an invite, click Resend invite in the Actions column
Update member roles
- In the Members list, locate the member whose role you want to change
- Click the dropdown next to their current role
- Select the new role from the dropdown:
- Owner - Full access to all organization settings and resources
- Admin - Manage members, settings, and products
- Member - Standard access to organization products
- Developer - Manage products and product developer settings for assigned products only
- Knowledge - Access to KnowledgeKit and documentation
- Customer Support - Handle support requests and DSARs
- Product Evaluation - Limited access for testing purposes
- The role change takes effect immediately
Assign product access to Developers
Developers can be restricted to access only specific products within your organization. This enables product-level access control, allowing you to maintain organizational boundaries by assigning each Developer role member to the specific products they need access to.
- Click Member Access in the left sidebar of the Organization dialog
- In the Members list, locate the Developer whose product access you want to manage
- Click the Select Products button in the Access column
- In the product selection dropdown:
- Use the search bar to find specific products
- Select the products you want to grant access to
- You can select multiple products for a single Developer
- The product access is assigned immediately
Only members with the Developer role can have product access restrictions. Owners and Admins have access to all products by default.
Remove members
- Locate the member you want to remove
- Click the menu icon (⋮) in the Actions column
- Select Remove member
- Confirm the removal
Important:
- You can't remove yourself while you're an Owner
- Each organization must have at least one Owner
Best practices
- Assign the minimum necessary role for each member
- Regularly review your member list and remove inactive users
- Use verified domains to automate member approval for trusted email domains
- Keep at least two Owners to prevent access issues